It turns out even seasoned beekeepers do not always know much about propolis, its benefits, research about it, and simple ways to use this wonderful substance at home. Sometimes you may get raw propolis that is heavily mixed with wax, woody particles, and other impurities. Knowing a simple way of cleaning propolis will help you end up with purified substance and subsequently a more potent DIY product.
Plus, if you use propolis in a recipe involving heating it, you will benefit from learning about the best temperature to work with.
Gathering and Cleaning Propolis for DIY Use
Before you can dive into the DIY magic, you’ve got to get your hands on some raw propolis. As a beekeeper I am lucky to have and use propolis collected by my lovely bees. Also I ask my fellow beekeepers not to discard propolis when they clean their hives but to collect and give it to me.
If you have not started your beekeeping journey yet, you might find a local beekeeper or shop that sells propolis, or online suppliers. Just make sure you’re getting it from a trusted source.
Tip: Propolis is heavier than water, so if you acquired a ball or roll of propolis and it floats, there are too many impurities in it and I would clean it before making any products.
After scraping propolis from frames and hive parts, it looks like this:
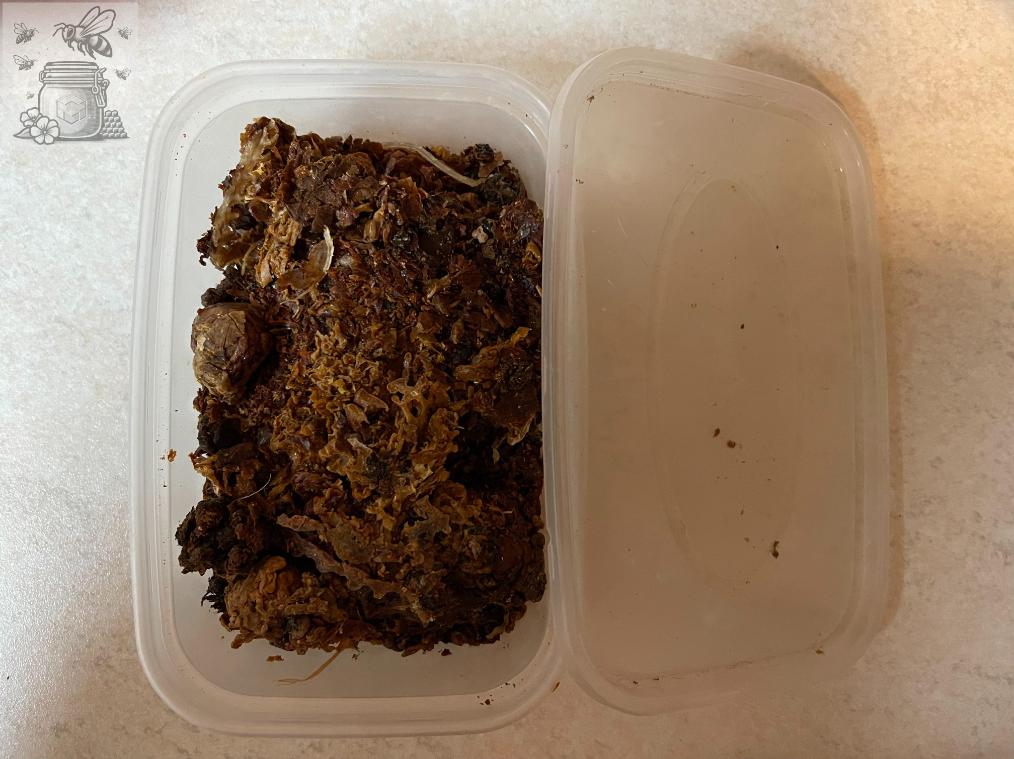
Remove any visible debris, like bits of wood and wax or dead insects. Then, place the propolis in a freezer for about an hour.
Tip: while handling propolis I would recommend wearing rubber gloves and covering the surfaces. Propolis can become sticky quite quickly even after freezing and it does not always come off surfaces.
Cleaning Propolis: Easy Step-by-Step Guide
Purifying propolis isn’t just about making it look nice. You’re getting rid of impurities that could lessen its effectiveness or, perhaps, even pose health risks. A well-prepped propolis means potent DIY products.
There are different methods of cleaning propolis, each with its perks.
Below is my tried and tested method which has proven to be very simple, fast and effective.
Step # 1
Once propolis is hardened, break it into even smaller pieces.

Tip: tie the frozen propolis into a piece of cheesecloth, so that when you break it, it does not scatter all over the place.
Step # 2
Place the propolis pieces into a pot and add some cold water. Keep in mind — heat makes propolis sticky.
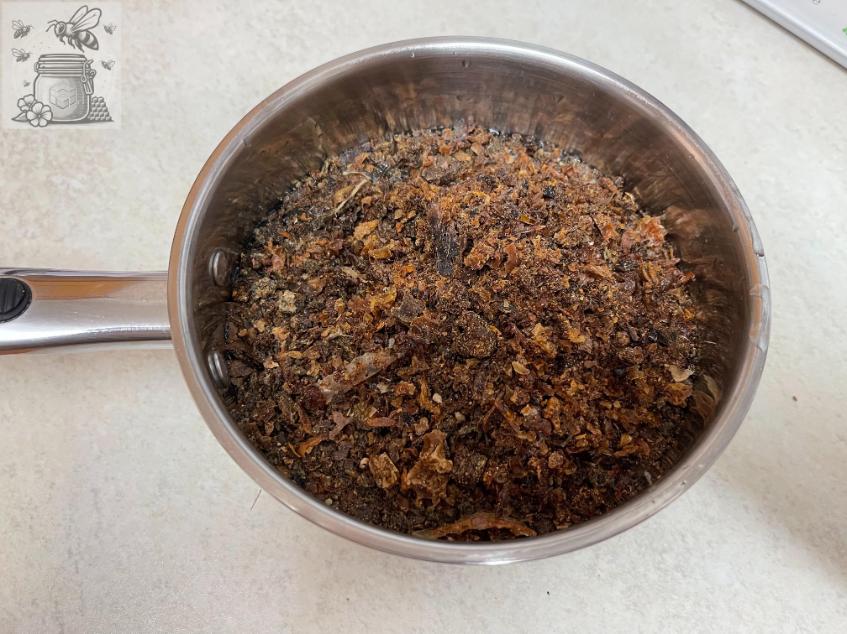
You can see that there are lots of impurities there, so the propolis mainly floats.
Step # 3
Using a hand held immersion blender, thoroughly mix the water and propolis.
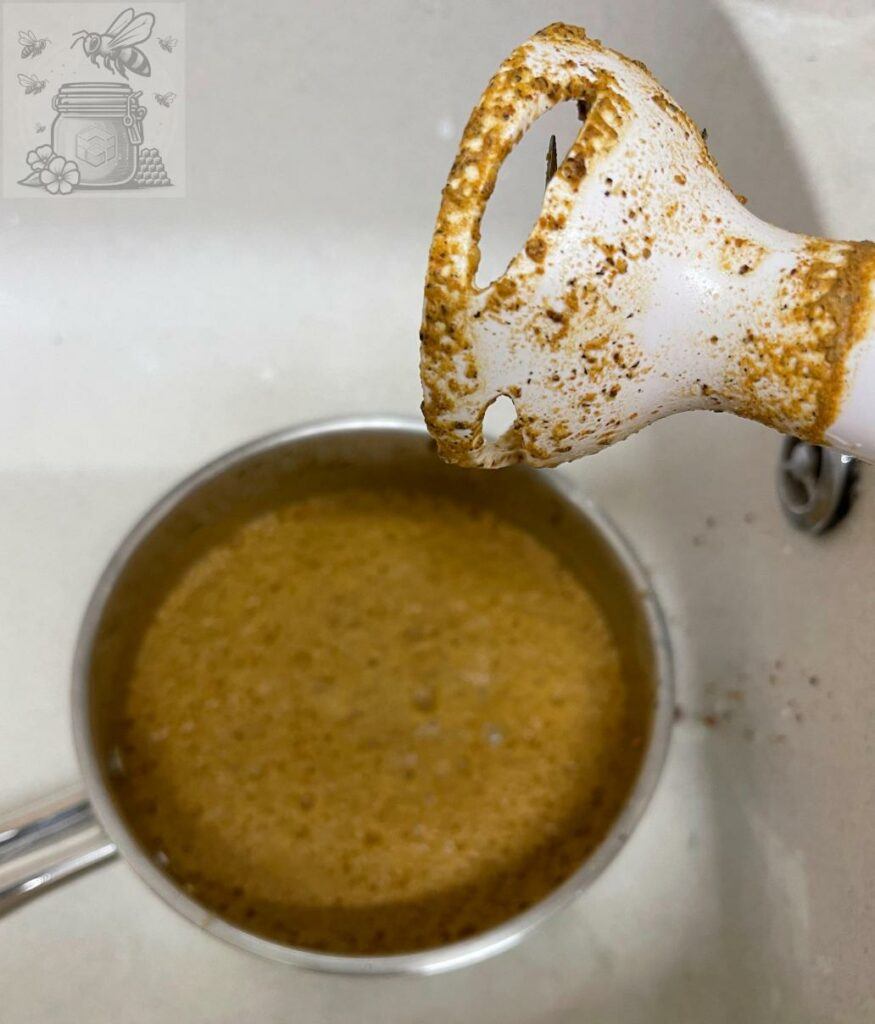
Tip: I would recommend using a cheap blender that you would not be worried to cover with propolis.
The one I use is actually not too difficult to clean quite well. But it is better to be on the safe side when working with propolis.

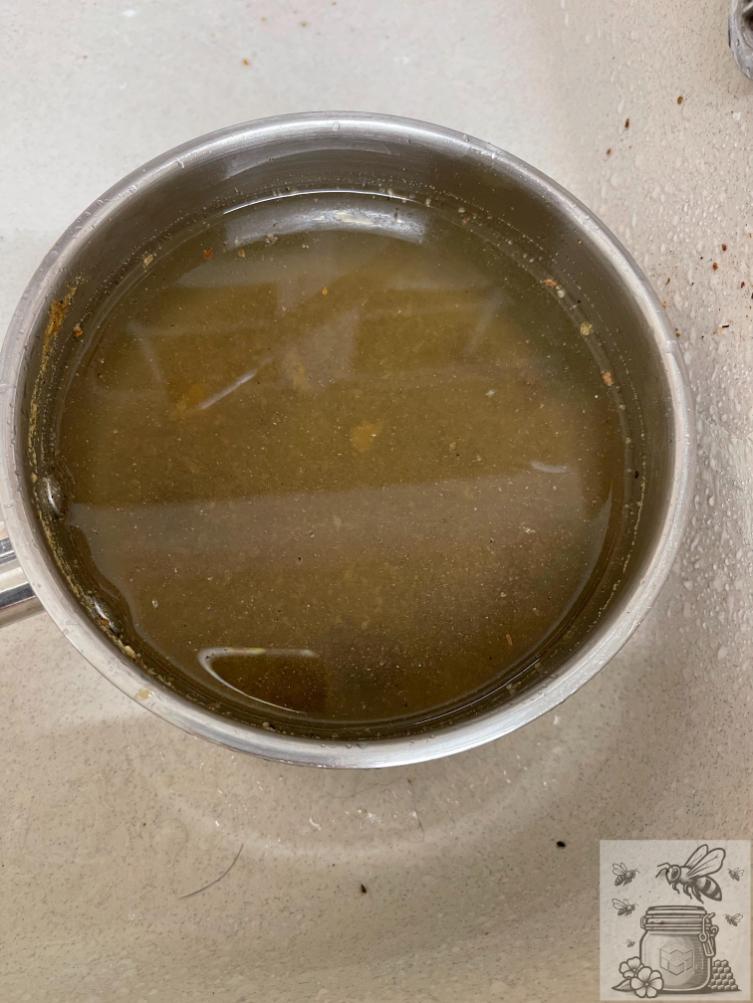
Let the blended mixture to sit for a few minutes. Carefully skimming off the top floating layer of foamy impurities, you will see that the heavy propolis has sunk to the bottom of the pot.
Step # 4
Rinse the propolis under cold water. I usually rinse 3-4 times until the water is clear.
Tip: if rinsing it under running cold water, put a fine mesh in the drain just in case you wash off some wax or other sticky substances that could potentially block your drain.
I simply fill the pot with fresh cold water a few times (until it looks clean), each time pouring it carefully out into soil in my garden.
Step # 5

When you are left with clean propolis, take it out of the pot and spread out for drying on a sheet.
For me foil does a perfect job.
Tip: use fine mesh with cheesecloth to drain the last bits of propolis.
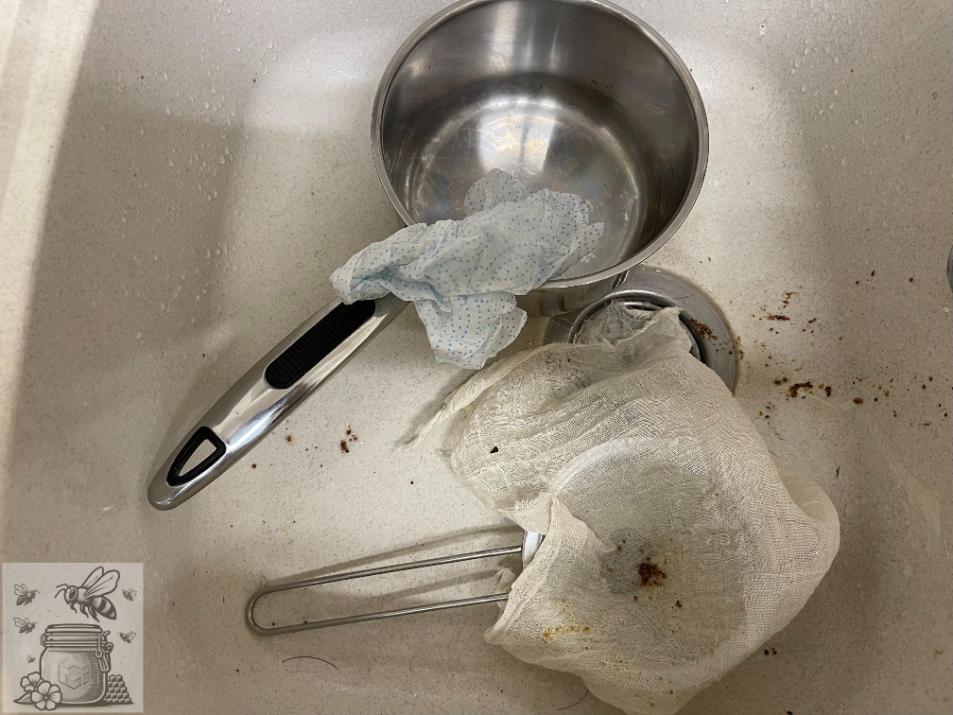
Wipe any pieces left in the sink with some kitchen towel and dispose of it into a waste bin, do not wash it down the drain! Remember that propolis becomes sticky when heated, so if it comes in contact with hot water, it could potentially block the drain.
Step # 6
Leave the propolis to dry at slightly cooler room temperature. I usually leave it for the night, and the next day it is dry and crumbly, and ready to use.
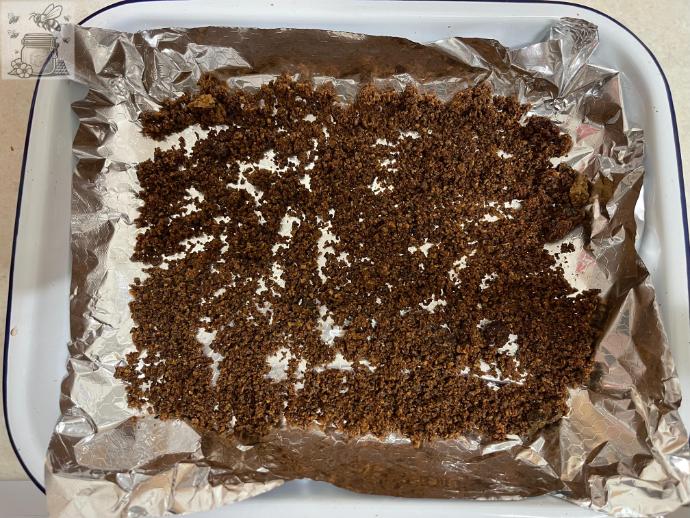
I collect it into the foil and put it in the freezer for future use. It can easily stay there for at least a year. Labelling it will help you to know the exact date you prepared it.
Now that cleaning propolis has been done, you can use it to prepare various products.
There is one more thing left to mention because some recipes require heating. And of course, we would like our home made products to be as potent as possible.
Heating Propolis: Techniques and Tips
To what temperature can propolis be heated without losing its beneficial properties?
There are some variations in answers to this question, however, there is research that suggests the crucial temperature to be 50°C (122°F). Going hotter can break down some of the compounds that make propolis so useful.
Research (2 examples)
Research on Propolis Stability and Maximum Heating Temperature
1. Study on Thermal Stability of Propolis Compounds
- Title: “Thermal Stability of Phenolic Compounds in Propolis: Effects of Heating and Storage”
- Researchers: Silva, R. B., Silva, J. P., Gonçalves, S. L., Borges, M. F.
- Institution: University of São Paulo, Brazil
- Date: 2017
- Published in: Journal of Agricultural and Food Chemistry
Description of Research:
- The study aimed to determine the thermal stability of various phenolic compounds in Brazilian green propolis, one of the most commonly used types in natural medicine.
- The researchers subjected propolis samples to different temperatures ranging from 30°C to 100°C (86°F to 212°F) for various durations to observe the changes in the concentration of key bioactive compounds.
Evidence and Results:
- The study found that at temperatures above 50°C, there was a significant reduction in the concentration of key phenolic compounds such as flavonoids and phenolic acids.
- At 60°C, the loss of these bioactive compounds became more pronounced, and by 70°C, the propolis had lost a significant portion of its antimicrobial and antioxidant properties.
Conclusions:
- The researchers concluded that to preserve the potency of propolis, especially its bioactive compounds, it should not be heated above 50°C. This ensures that the phenolic compounds retain their stability and efficacy.
2. Study on the Effect of Heat on Propolis Antioxidant Activity
- Title: “Effect of Heat Treatment on Antioxidant Activity of Propolis Extracts”
- Researchers: Dobrowolski, J. W., Vohora, S. B., Sharma, K., Naqvi, S. A.
- Institution: Warsaw University of Life Sciences, Poland
- Date: 2020
- Published in: Food Chemistry
Description of Research:
- This research examined how different heat treatments affected the antioxidant activity of propolis extracts from various geographical regions.
- The extracts were heated at temperatures ranging from 30°C to 90°C for up to 2 hours, and their antioxidant activity was measured using standard assays such as DPPH and ABTS.
Evidence and Results:
- The results showed that antioxidant activity remained stable up to 50°C but began to decline significantly at temperatures above 60°C.
- The propolis extract heated at 70°C for 1 hour lost around 25% of its antioxidant activity, while those heated at 80°C lost more than 40%.
Conclusions:
- The researchers recommended that propolis should not be exposed to temperatures exceeding 50°C to maintain its antioxidant efficacy. They highlighted the importance of gentle processing methods to preserve the natural potency of propolis.
Summary
The research consistently suggests that the maximum temperature to heat propolis without compromising its potency is around 50°C (122°F). Above this temperature, significant degradation of bioactive compounds occurs, leading to a reduction in its antimicrobial and antioxidant properties. The studies from Brazil and Poland underline the importance of maintaining lower temperatures during the processing and use of propolis to preserve its beneficial effects.
When making a product requires heating propolis, using a double boiler or a slow cooker with a water bath would be best. It helps keep the heat controlled and prevents direct contact with high temperatures. Fill the bottom pot with water and place the propolis in the top pot. Let the steam do the work. Stir occasionally to help it along.
If using a slow cooker with a water bath, set it to low and place the propolis in a heat-resistant container within the cooker. Patience is key here, as you want to avoid rushing the process.
Properly heating and cleaning propolis ensures its potent properties stay intact, making your homemade creations all the more effective.